
HardHat - Understanding the basics
MERN Stack Developer | web3 | Entrepreneurship | Leveling up Follow me on Twitter
Hardhat is a development environment that allows you to quickly edit, compile, debug and deploy your smart contract and Dapps, you can pretty much think of it as a framework.
Hardhat Runner is the main component you interact with when using Hardhat. It's a flexible and extensible task runner that helps you manage and automate recurring tasks inherent to developing smart contracts and Dapps.
Each cmd on the CLI executes a task, such as
npx hardhat compileruns the built-in compile taskInstallation syntax
npm install --save-dev hardhat.- To use your local installation of hardhat, run
npx hardhat. This will set you up with the following setup.
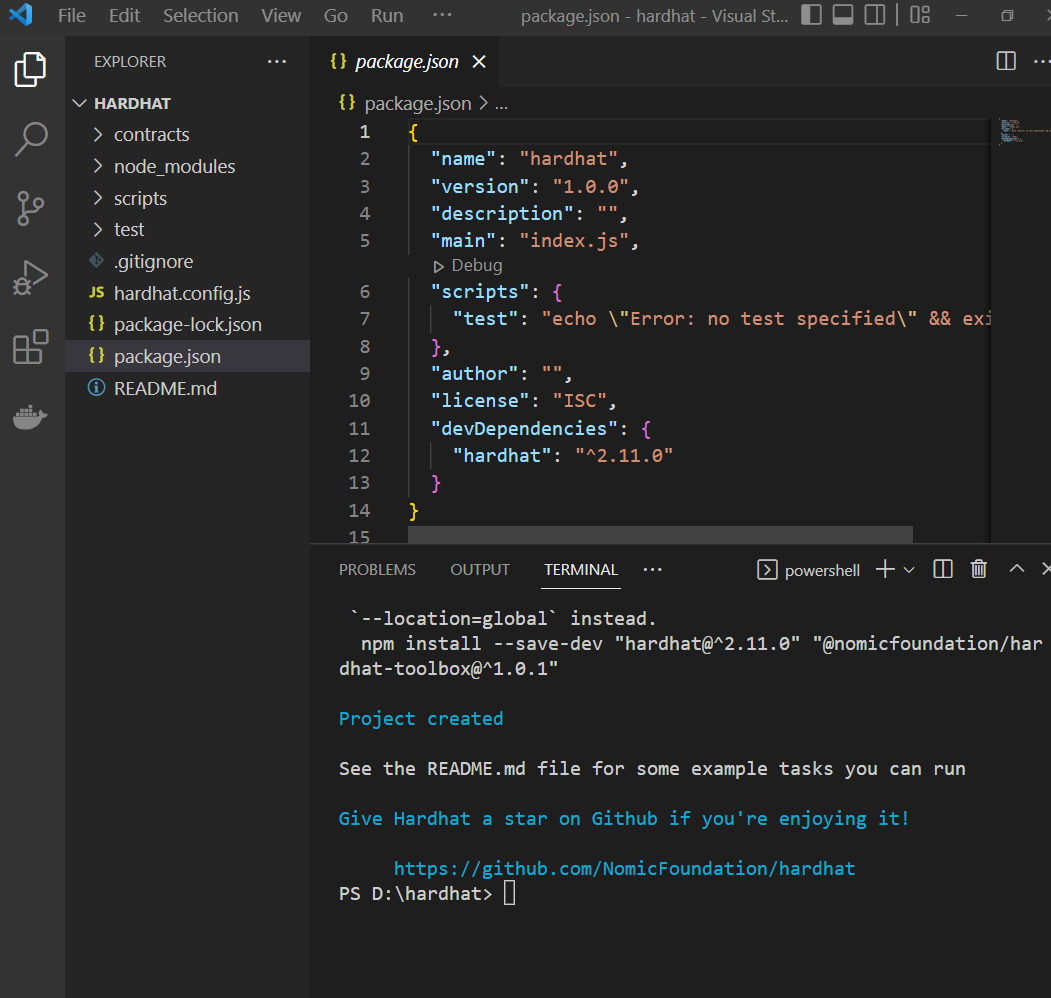
Keep in mind to use your code editors terminal when you run npx hardhat. as you won't get the desired output running it on wsl.
Now if you look at the below layout, you'll notice a Lock.sol file within the contracts folder, to compile the following file =>
npx hardhat compile. Hardhat is wise enough to know the contracts/ is in the contracts folder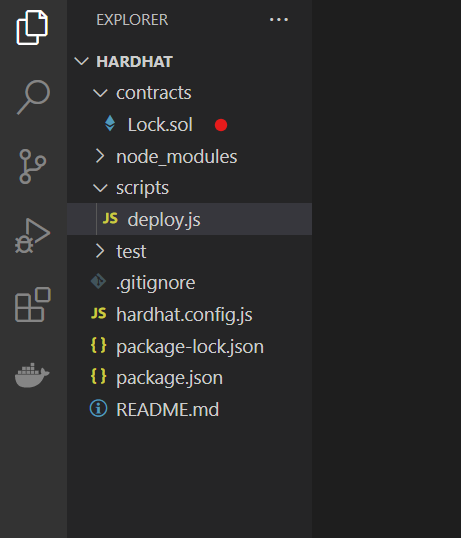
Once you run hardhat and set up the basics keep a check on the prompts, i.e if they tell you to install the dependencies separately, If yes install the below-mentioned dependencies
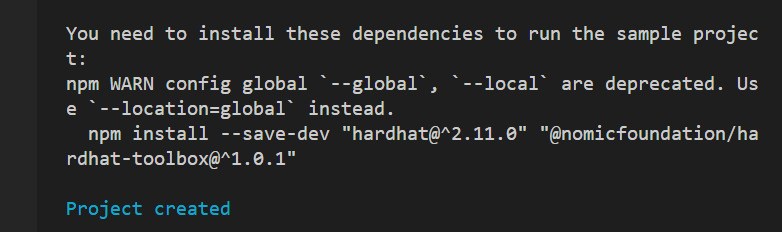
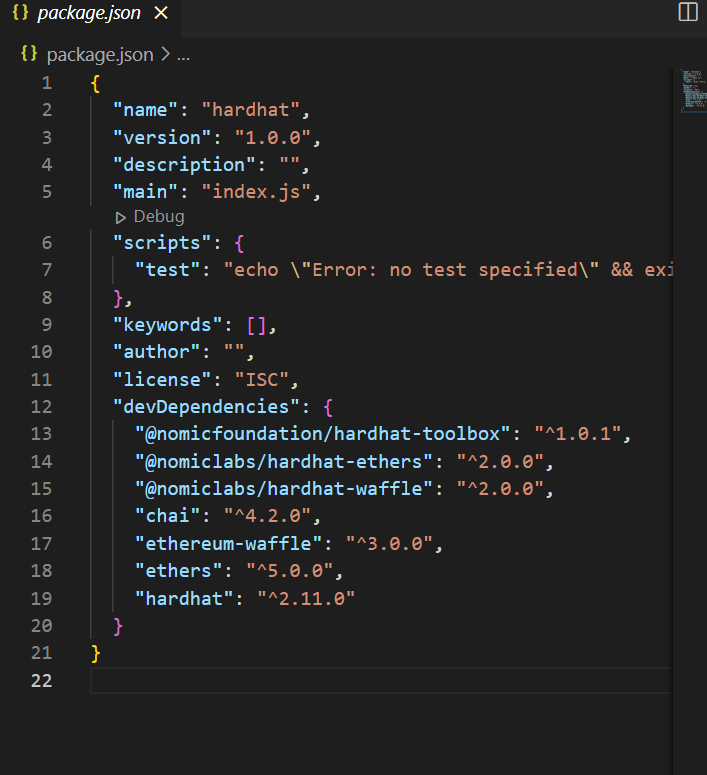
- I would also like you to install the following dependencies
npm install --save-dev "chai@^4.2.0" "ethereum-waffle@^3.0.0" "ethers@^5.0.0" "@nomiclabs/hardhat-ethers@^2.0.0" "@nomiclabs/hardhat-waffle@^2.0.0" - Now if we look into our package.json we'll see our list of dependencies.
- The scripts/ folder holds scripts that we use to interact with the contract.
- The test folder holds a series of tests we use to test out our contract
- HardHat.config is an entry point for all the scripts that we write
const { task } = require("hardhat/config");

require("@nomiclabs/hardhat-waffle");

task("accounts","Prints the list of accounts", async (taskArgs,hre)=>{
  const accounts =await hre.ethers.getSigners();
  for (const account of accounts){
    console.log(account.address);
  }
})

/** @type import('hardhat/config').HardhatUserConfig */
module.exports = {
  solidity: "0.8.9",
};
- If you run npx hardhat you'll get a list of tasks that you can run on hardhat such as the following
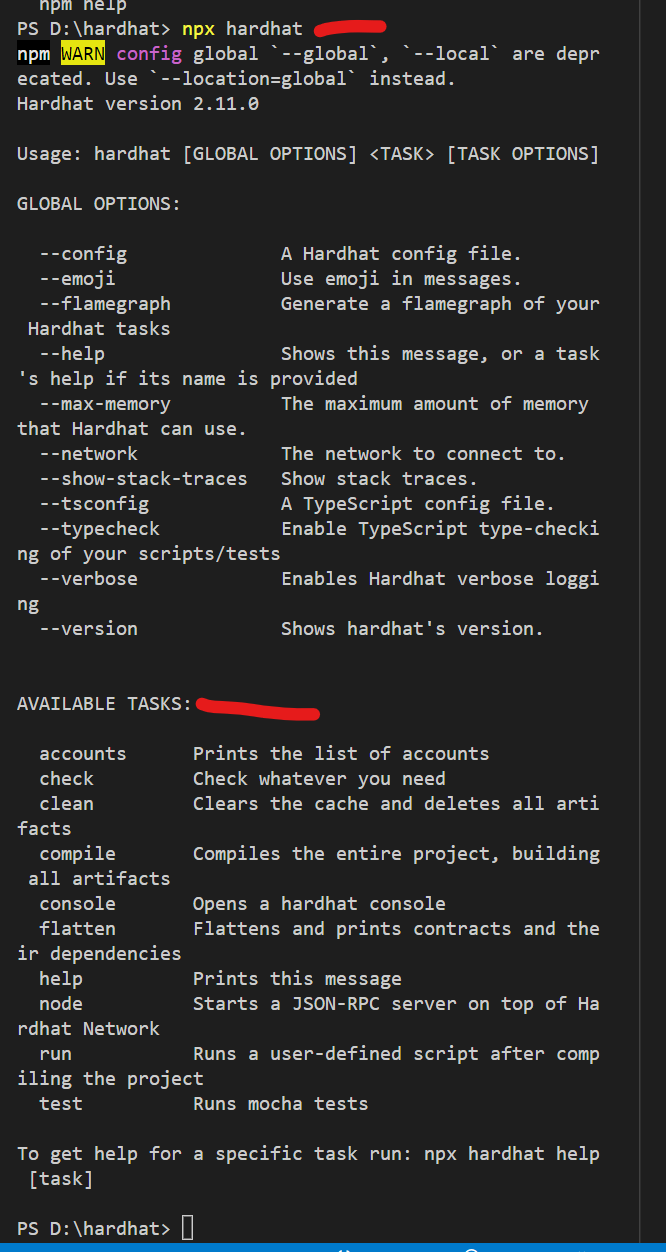 -Sidenote: to run any task we use npx and not npm. ->
 npx hardhat taskName
- now let's compile our lock.sol file from the "contracts/" folder.
npx hardhat compile
Before we move forward lets revise what is ContractFactory.
To deploy a contract, we need to send additional information that is not present in the contract. such as
abi is a way to interact with the contract
bin is the binary file that contains the contract
wallet is used to sign your transactions on the contract.
Since we are using Hardhat, we don't need to mention the above parameters as hardhat already knows that the solidity file is present in the contract/ folder and the binary and abis are present in the artifact/ folder. So here we just have to pass the solidity contracts name as parameter.
Now that we have our contractFactory we can do the same thing we do in ethers to deploy the contract.
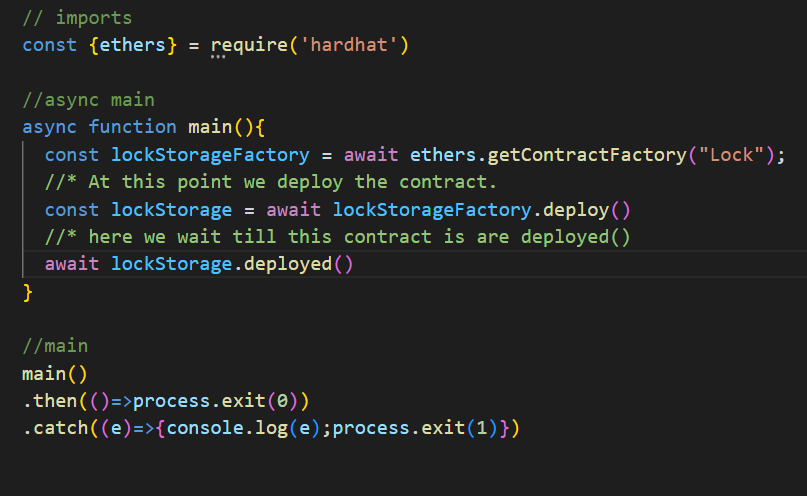
Now if you remember, in plain old ethers, we should pass a parameter called a wallet. which was a combination of your RPC-URL and your private key. But so far in hardhat, we haven't done that.
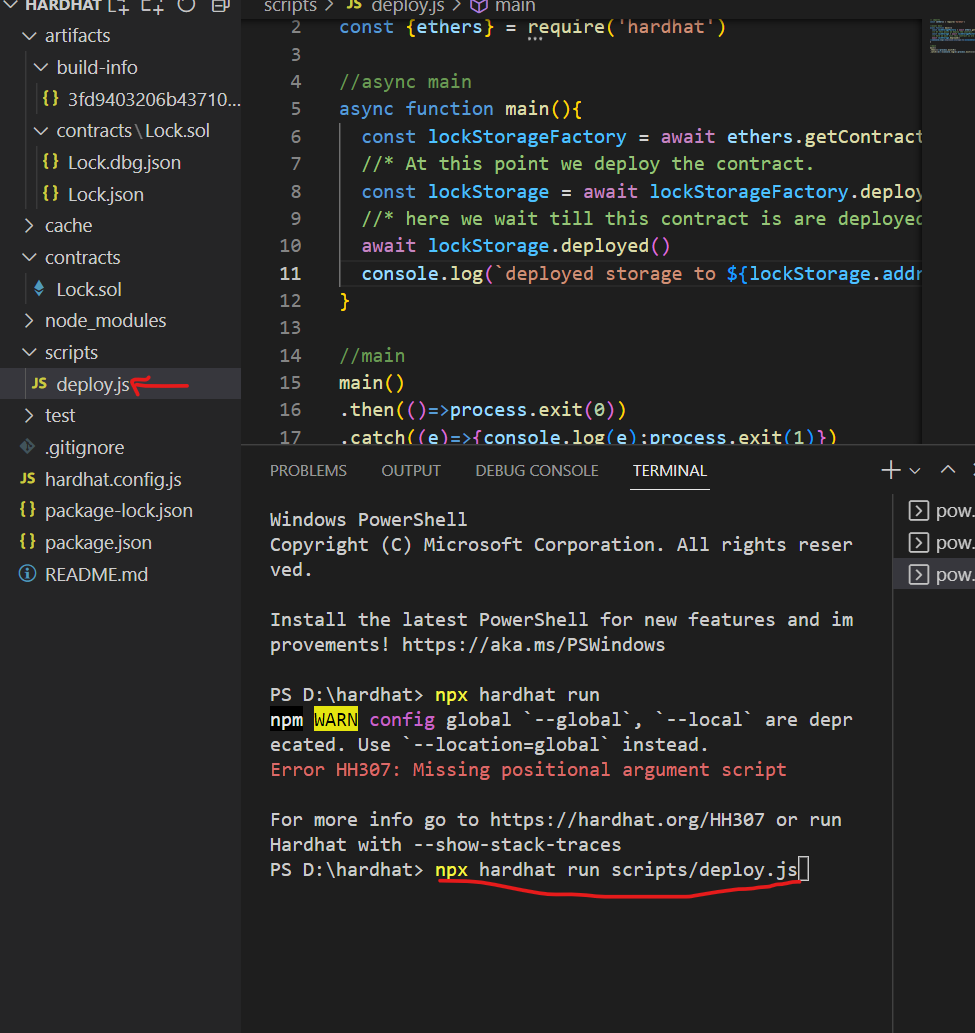
Let's try running this by running
npx hardhat run locationOfContract
Sidenote: I changed the contract moving forward.
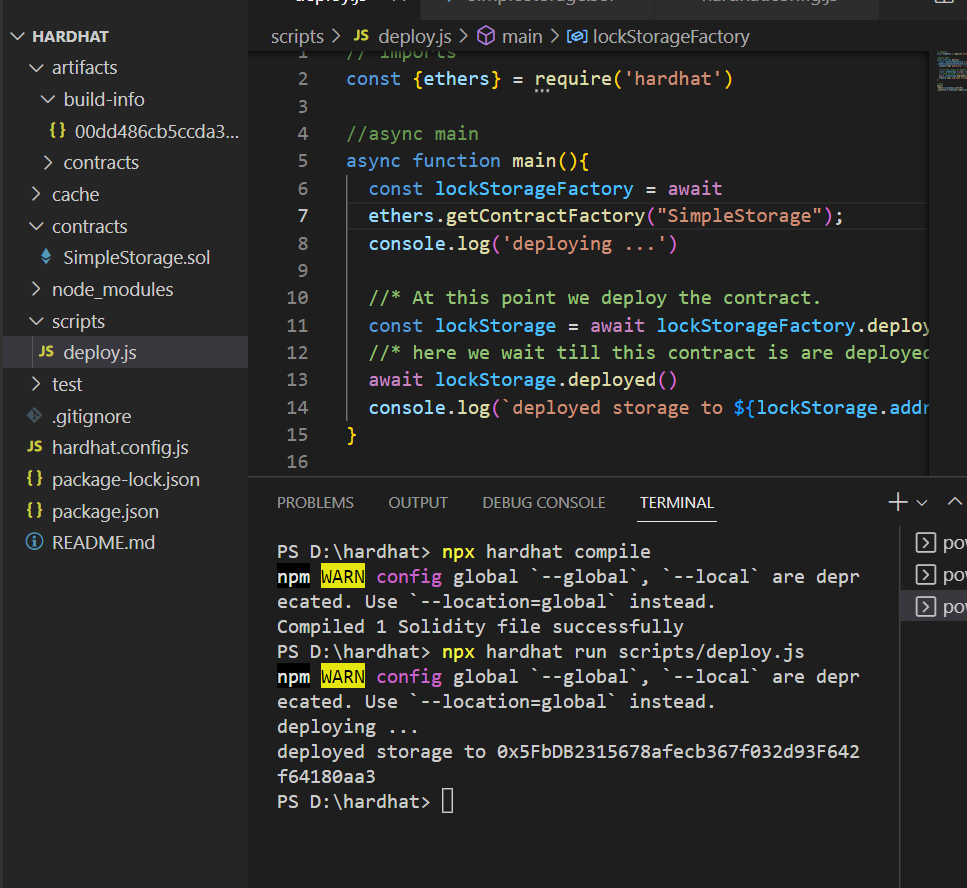
- Now Once we've compiled and run, we can see that even without the RPC-URL and the private key we still managed to host this contract at the above-shown address. How is that possible?
Hardhat Network
Hardhat comes with a built-in Hardhat network, similar to a local Ethereum network node designed for development, similar to Ganache. It basically allows you to deploy, run, and test your contracts on this fake network. Basically, all these tasks that we execute, get executed on this fake hardhat network. This is one of the major benefits of using a hardhat network, i.e you don't have to worry about the RPC-URL or the private key while coding.
you can explicitly choose which network you want your script to run on
npx hardhat run scripts/deploy.js --network hardhatHaving his network flag makes it easy to switch across different blockchains, private keys, etc. Now How do we add a different network?
- Firstly, we go to our file called hardhat.config.js
module.exports = {
defaultNetword: "hardhat",
networks: {
    rinkeby:{
      url: process.env.RINKEBY_PRC_URL,
      accounts:[process.env.PRIVATE_KEY],
      chainId: 4,
      }
  }
}
- with this, we can now even test it out on the rinkeby network.
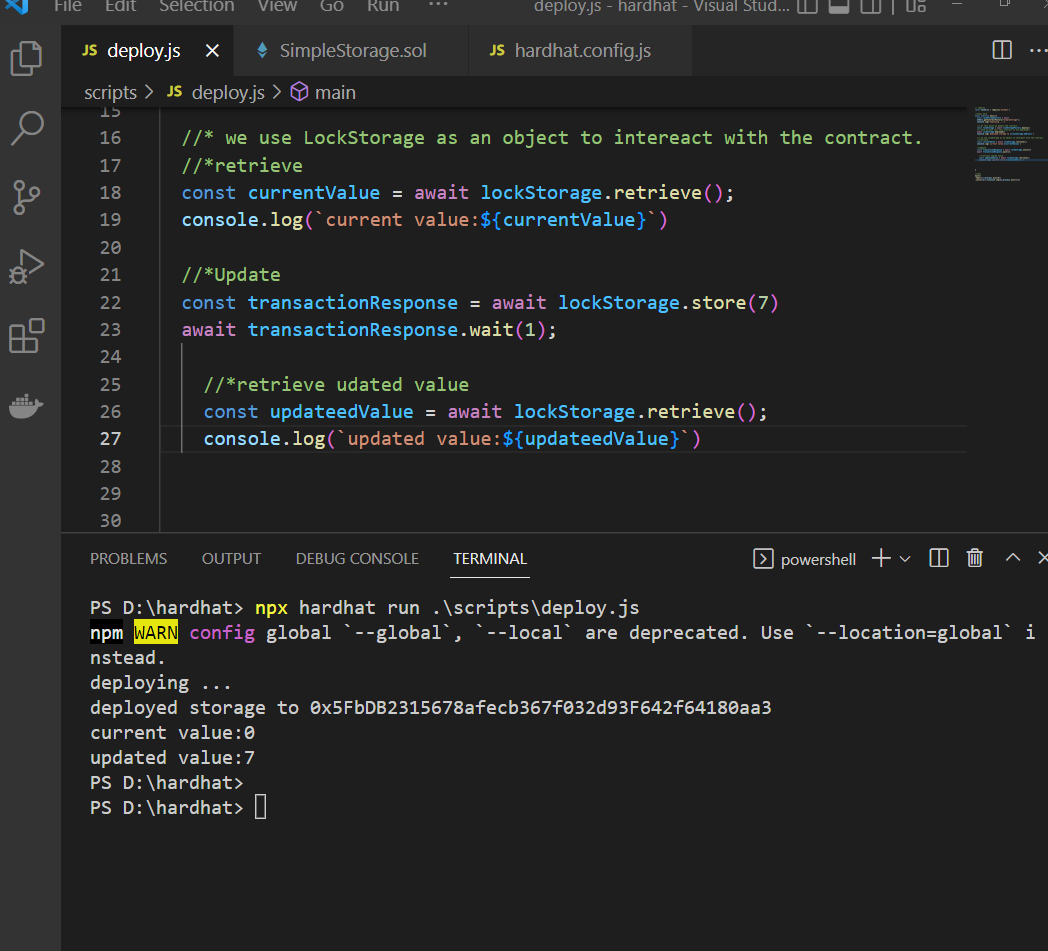
Interacting with Contracts in HardHat
we can call our abis just as normal functions associated with the contract object. My current contract has 2 abis
retrieve() to retrieve a number
store() to store a number
- You don't have to worry about big numbers
Creating your own tasks.
we can create our own tasks, en example of a task would be as follows. We can create a task in hardhat.config.js directly or create a folder called tasks/taskname.js
/* task (
  "name of tasks",
  "Description of accounts",
  "action to be carried out")
*/

task("accounts","Prints the list of accounts", async (taskArgs,hre)=>{
  const accounts =await hre.ethers.getSigners();
  for (const account of accounts){
    console.log(account.address);
  }
})
- accounts.js
const {task} = require("hardhat/config");

//define a task
task("accounts","Prints the list of accounts", async (taskArgs,hre)=>{

  //hre-> Hardhat runtime environment
  //hre can access all the packages the hardhat package can.

  const accounts =await hre.ethers.getSigners();

  for (const account of accounts){
    console.log(account.address);
  }
})
- getBlockNumber.js
const {task} = require("hardhat/config");

//define a task
task("block-number","prints current blocknumber", async (taskArgs,hre)=>{

  //hre-> Hardhat runtime environment
  //hre can access all the packages the hardhat package can.

  const blockNumber =await hre.ethers.provider.getBlockNumber();

  console.log(`current block number ${blockNumber}`)
})

//export task
module.export = {}
- to make it work, we require this task in the hardhat.config.js file.
require(./tasks/blockNumber)
- run
npx hardHatto see your new tasks. npx hardhat blockNumber-> gives you the current block number from your custom tasks.
HardHat localhost Node.
- suppose you need an address of an account with a private key. run
npx hardhat node - this basically starts a node network on the localhost. you can see all additional information while working with it.
- to work with the localhost you need to specify it on the hardhat.config.js network.
networks:{
  localhost:{
      url: "http://127.0...",
      chainId: 31337,
    }
}
hardhat run scripts/deploy.js --network localhost
Running Tests
One of the biggest things hardhat is helpful for is running tests. Running tests is really important, the reason being that our code is visible for everyone to see. and once deployed cant be changed.
rekt.news is an amazing place to see all the hacks that have been carried out, and what caused these hacks in the smart contracts. Writing really strong tests is always going to be about the first line of defense.
- Create "tests/test-deploy.js"
const {ethers} = require("hardhat");
const {expect,assert} = require ("chai")

describe("Test for  SimpleStorage", ()=>{

let simpleStorageFactory,simpleStorage


// we run beforeEach before every it
  beforeEach(async () => {

    simpleStorageFactory = await ethers.getContractFactory("SimpleStorage");
    simpleStorage = await simpleStorageFactory.deploy()

 })

//test condition that's executed
it("Should Start with 0", async function () {
  const currentValue = await simpleStorage.retrieve()
  const expectedValue = "0"

 assert.equal(currentValue.toString(),expectedValue)
}


})
describe() is a function which hardhat and mocha will understand, it takes 2 parameters
hardhat test uses the mocha framework, which is the javascript framework used to test our code.
We run these test by using the following cmd
npx hardhat testto run all the testsnpx hardhat test --grep stringthis string is searched in all first parameters of it()
We can also test how much has each function uses
library
npm i hardhat-gas-reporter --save-devThis is an extension that gets attached to all of our tests and automatically gives us an output of how much gas each function calls.hardhat.config.js ->
require("hardhat-gas-reporter")

module.exports = {
  //above code
  gasReporter: {
    enabled:true,
    outputFile: "gas-report.txt",
    noColors:true
  }
}
Now that we have set it up, lets run the following cmd
npx hardhat testAnother plugin you can use is the npm i --dev solidity-coverage it runs through the entire solidity code, prompting you which line of code does not have test cases.
go the the hardhat.config.js file => `` require("solidity-coverage")
run
npx hardhat coverage- we'll get a file called coverage.json