
Ethers.js - Understanding the basics
MERN Stack Developer | web3 | Entrepreneurship | Leveling up Follow me on Twitter
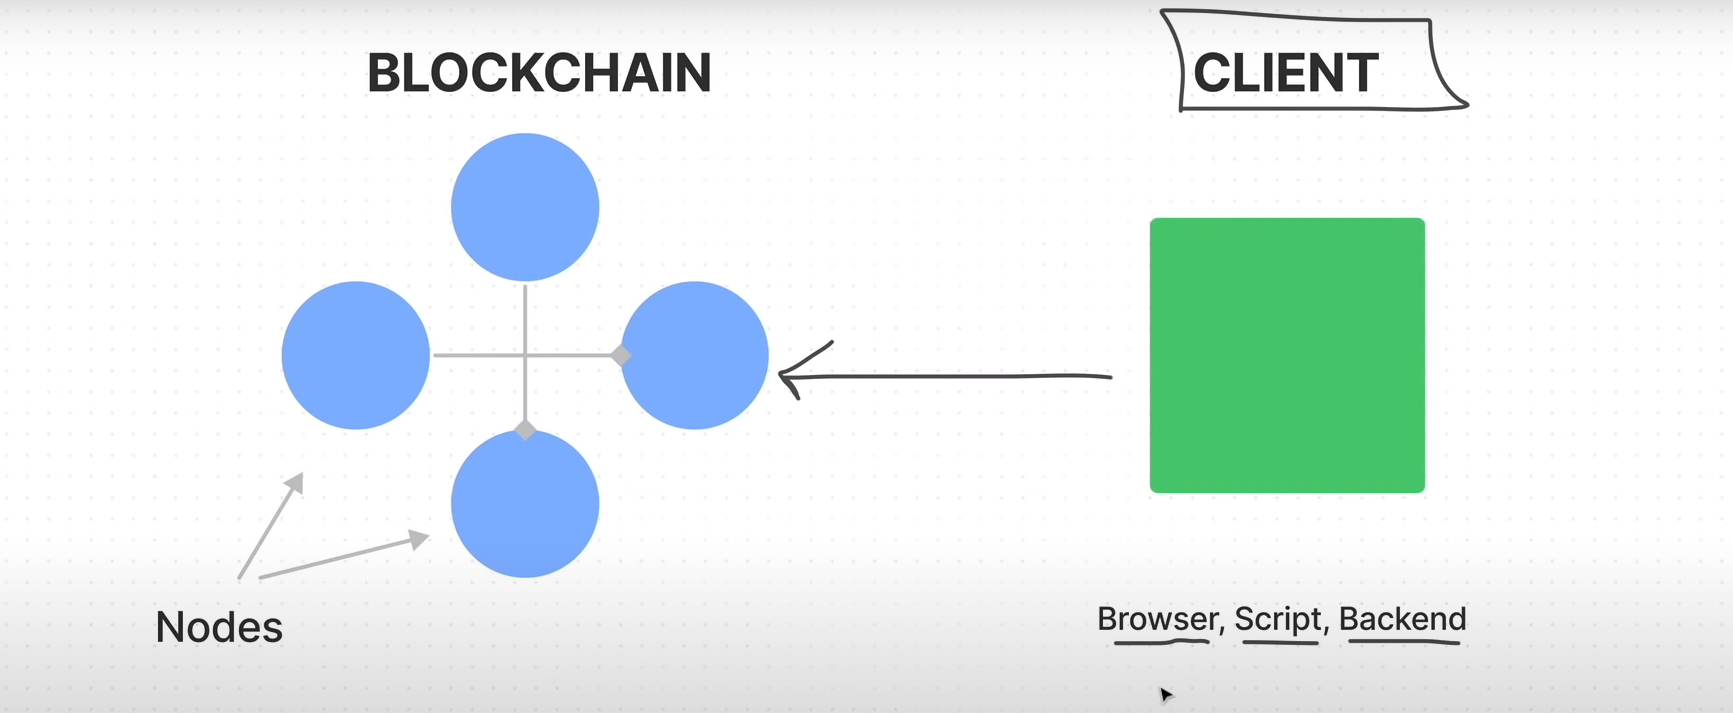
Ethers.js is a library, written in javascript that allows you to connect any application to an Ethereum blockchain and its ecosystem. It's basically a bridge that connects the client to the blockchain
How to import Ethers into your project.
- npm i ethers
const {ethers} = require("ethers")
How to Compile your contract
- The deploy script will replicate exactly what's going on to remix i.e how to deploy your solidity code onto the blockchain
- The first thing we do before adding the contract to the blockchain is to compile it, thereby creating a bin file and an abi file.
- In order to compile a solidity file we use the solc-js package
npm i solc - solcjs has an automatic way to compile contracts and import other contracts via relative paths.
- To install it globally you use
npm i -g solc. The benefit of installing it globally is you get access to a solcjs package. - To compile a contract with a relative path with the global file called solcjs, we use the following syntax.
-To compile a contract that imports other contracts via relative paths:
npm solcjs --bin --abi --include-path node_modules/ --base-path . -o . MainContract.sol bin means you want the binary file of the contract.
abi means you want the abi info of the contract in a file.
base-path . -means the base path is in the current directory
-o . => means the output should be in the current directory.
MainContract.so => is the contract name.
2 files will be created
=> solidityFile.abi : which holds the abi of the contracts.
=> solidityFile.bin : which holds the binary of the contracts. Binary files hold low-level information about the contracts.
How to Deploy your contract.
There are two ways, both have different instances
- Javascript VM: It will run an isolated Ethereum node in the browser. It is very useful when you want to test a contract. => basically fake blockchain
- Injected Web3: It will try to use the "Web3 provider" embedded in the browser. For example, the MetaMask extension will embed a "Web3 provider", you can configure to connect that provider to a testnet or to mainnet. This allows interaction with a real network. => actual node
Javascript VM
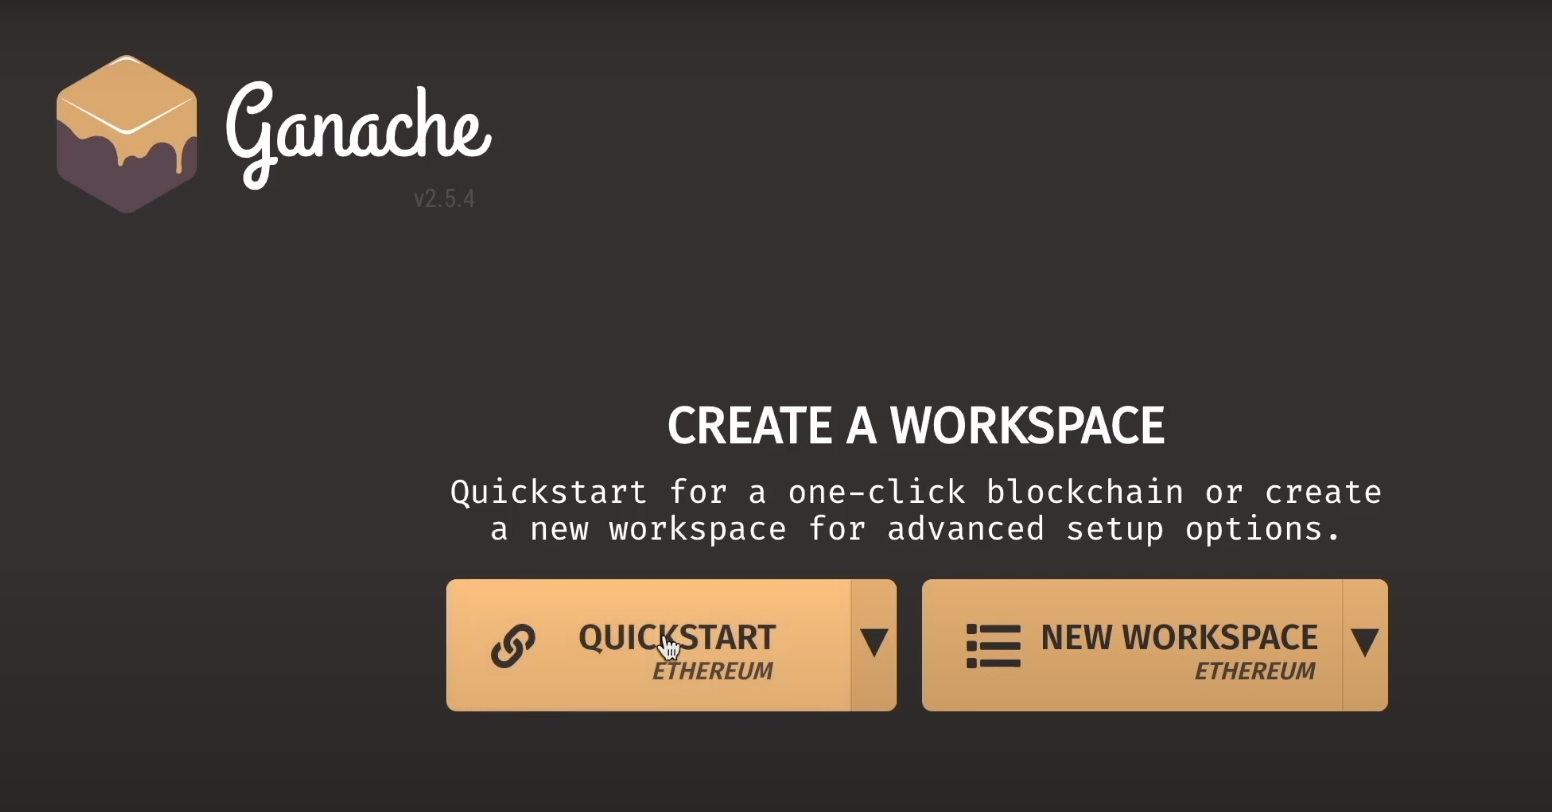
- First, we'll need to install Ganache on our local machine, it enables you to connect to a fake blockchain present in your system.
- Once you are done installing Ganache, click on quickstart Ethereum, this will enable us to start a fake blockchain really quickly.
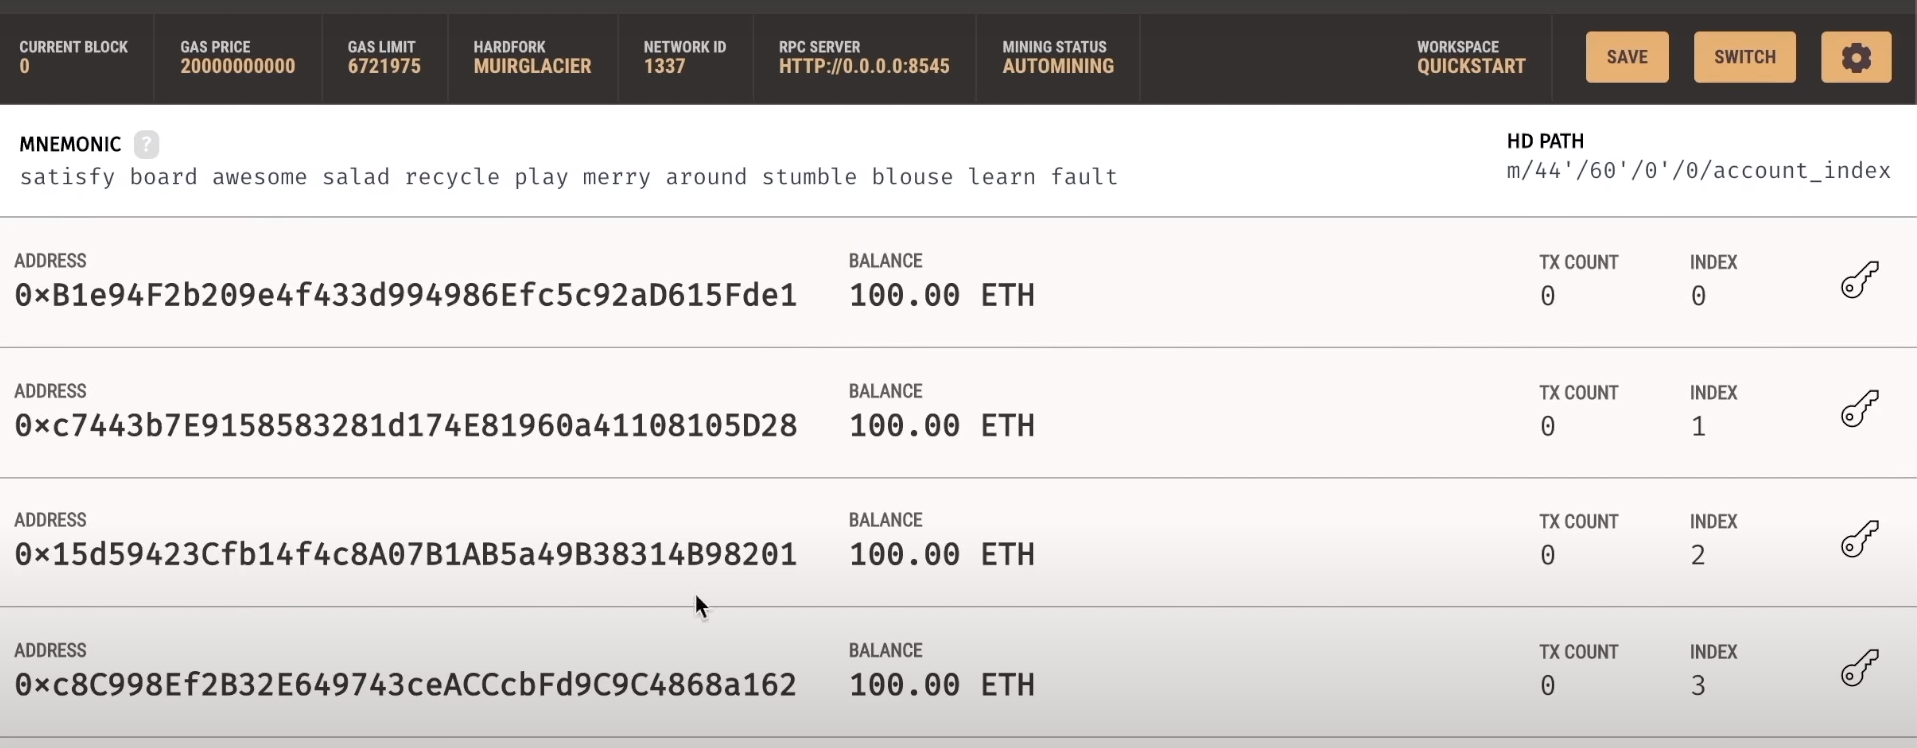
- You'll pretty much get a fake blockchain running on your system. it comes with a whole bunch of fake accounts which you can use. It also comes with the account's respective private keys to take control of the respective accounts
- Now that we have set the fake blockchain locally, we need to connect our contract to this fake blockchain. Remix does this behind the scenes... we'll have to do it manually.
- to connect to the blockchain we need a couple of things
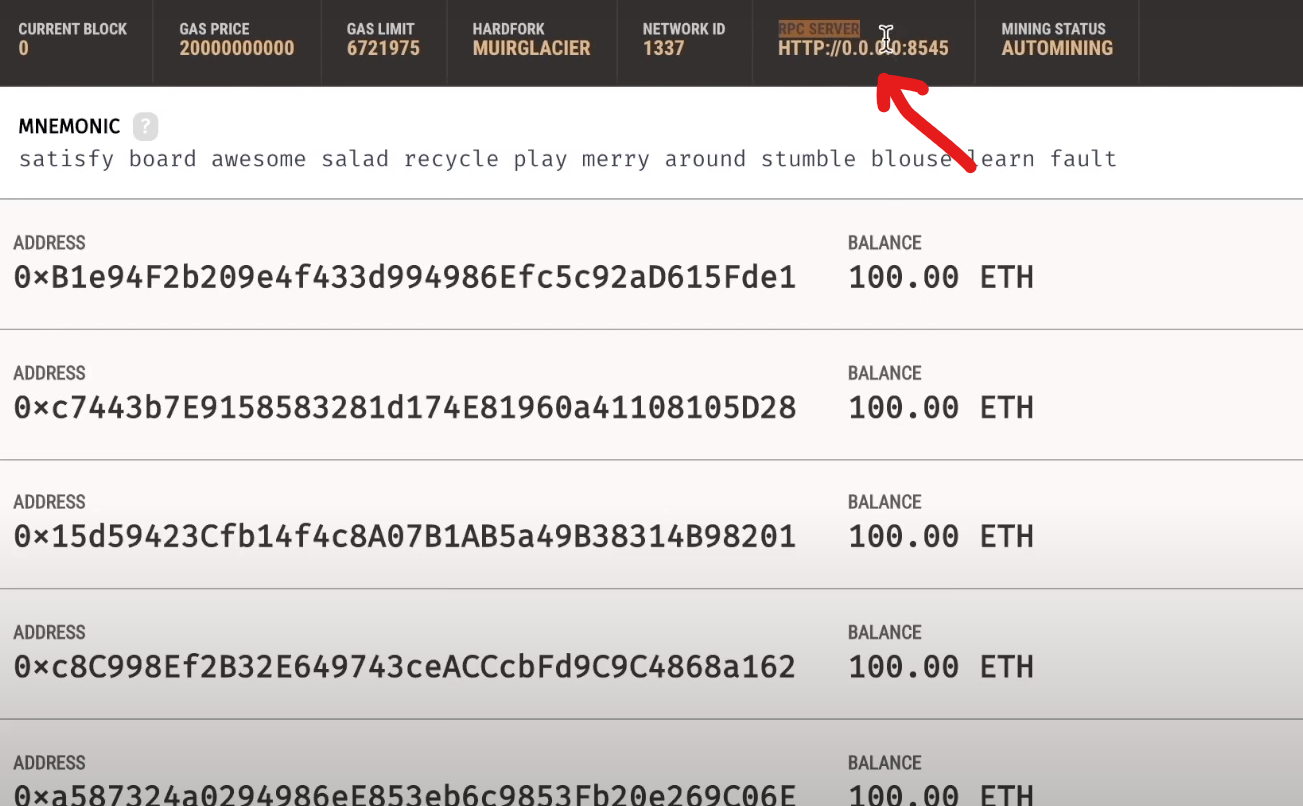
RPC URL -> this URL is basically a connection to a node to connect to a blockchain.
now if you go back on Ganache, we can notice the RPC SERVER mentioned above. We require this to connect to our fake blockchain.
Ethers
Now that we've set this up, we can finally use Ethers.js, As I've mentioned before, ethers allow you to interact with different blockchains, it's basically a bridge between your blockchain and your client.
- installation syntax
npm i ethers - import ethers to use on our client side.
const ethers = require("ethers") - Now HOW DO WE CONNECT ETHERS TO THE BLOCKCHAIN =>
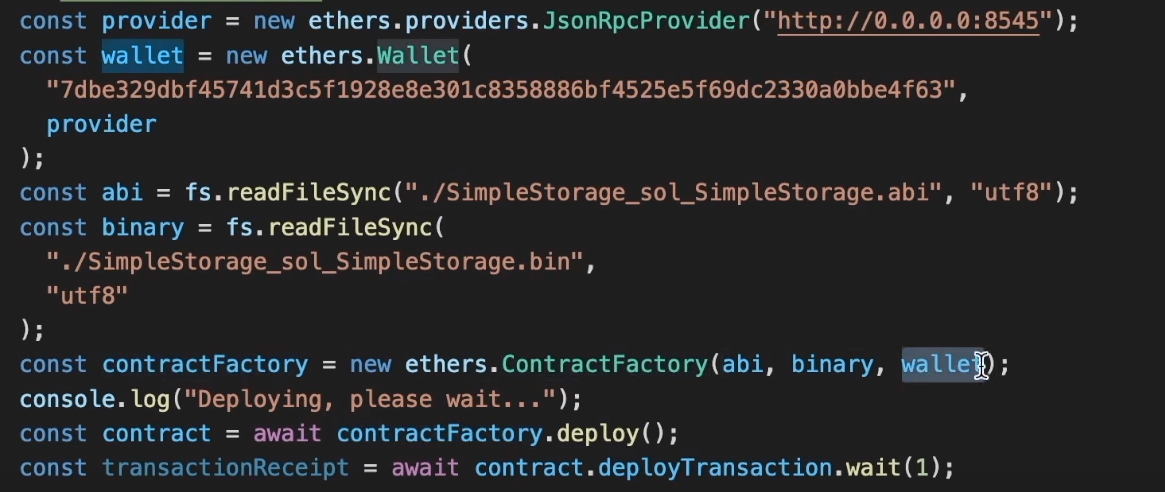
const provider = new ethers.providers.JsonRpcProvider("http://0.0.0.0:8545") - The above-mentioned URL is the RPC we got from our Ganache blockchain dashboard.
- Now that we have connected to the blockchain, how do we show what address belongs to us?
- To solve the above problem we pass in our private key. which we get from the Ganache dashboard by clicking the key symbol on the extreme right.
- `` const wallet = new ethers.Wallet("Private_Key",provider);
- where the provider is the above-mentioned way to connect to the blockchain
const provider = new ethers.providers.JsonRpcProvider("http://0.0.0.0:8545") SideNote: use envs to save in your private keys. don't save them publically, or you might end up losing all your money from your accounts...
The above 2 lines should be more than enough, for now, to connect to your blockchain and interact with it.
Deploy our contract
Now that we have connected to the fake blockchain, how do we deploy our smart contract to the blockchain?
- To deploy we need the obvious 2 files. i.e the .abi file which you get when you compiled the solidity file. and the second one is the .bin file which is the low-level binary file of the contract.
const fs = require("fs-extra");
async main(){
//code
const abi = fs.readFileSync("./ContractFile.abi","utf8");
const bin = fs.readFileSync("./ContractFile.bin","utf8");
}
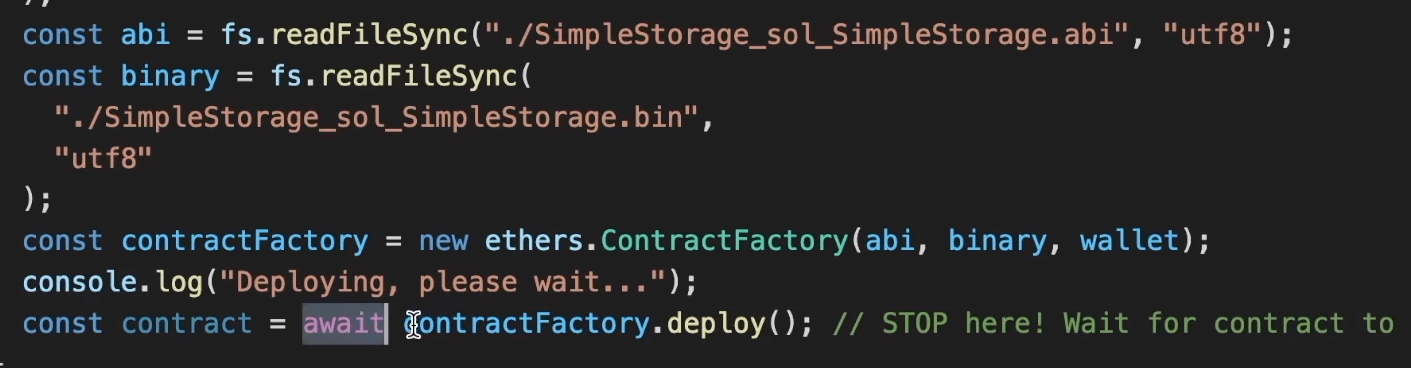
- now finally what we've been waiting for -> Deploying the contract.
- we use the contractFactory from ethers library. it's basically an object used to deploy contracts
const contractFactory = new ethers.ContractFactory(abi,binary,wallet);abi is a way to interact with the contract
bin is the binary file that contains the contract
wallet is used to sign your transactions on the contract.
- and finally `` const contract = await contractFactory.deploy()
###Overrides not only can we deploy our contract, but we can also add limits on how much gas is used, gas limits and so on...
- we just have to pass it as an object within the deploy function
deploy({})
Additional Information
- wait one block conformation after deploy ->
const deployReceipt = await contract.deployTransaction.wait(1); - what I mean by that is wait till one block is added on the blockchain with the contract information on it.
- let's understand the difference between deployment Receipt and deployment Transaction
Deployment Receipt is what you receive once your transaction is added to the block, and that blockchain is added to the blockchain.
Deployment Transaction is when a transaction is done.
how to get the nonce : await wallet.getTransactionCount();
Don't worry about signing the transaction, as hardhat takes care of it.
Interacting with Contracts in Etherjs
Now that we've deployed our contract with ethers, how do we interact with it?
- first things first, contract is the object that you got when you deployed the contract
const contract = await contractFactory.deploy() - interacting with the contract is as simple as calling the contract object, followed by the abi().
- Before we move forward just have a look at the overview of what we've done so far.
- all retrieved numbers are in the big-number format, this is done to prevent the loss due to precision. to solve this problem we return or send values in form of strings.